Replacement 40 x 20 mm, 5V Fan for 3Com Baseline Switch 2928-SFP Plus (Conclusion)
This article is the final part of the story titled Replacing a 40 x 20 mm, 5V Fan for a 3Com Baseline Switch 2928-SFP Plus.
I chose the Noctua NF-A4x20 5V, Premium Quiet Fan, 3-Pin, 5V Version (affiliate link) after I learned that these fans are high quality and very quiet.
Noctua makes both 12V and 5V fans. The company also offers 3 and 4 wire variations for each. You need the 5V, 3-wire version for the 3Com Baseline Switch. I had a bad experience with Amazon's customer service when I tried to return the 12V version of this fan. Read about it here.
The Noctua kit is well designed. It has a lot of parts to suit any situation you might face. I will only focus on the parts I used for this project.
The fan connector on the 3Com is proprietary. I used the OmniJoin adapters that came with Noctua to connect the fan to the 3Com connector. I cut off the connector from the old fan and the connector from the Noctua fan. Each pair of wires (Black-Black, Red-Red, White-Yellow) goes into an OmniJoin adapter (the kit has 4, you will use 3) and using pliers locked/connected the two wires.
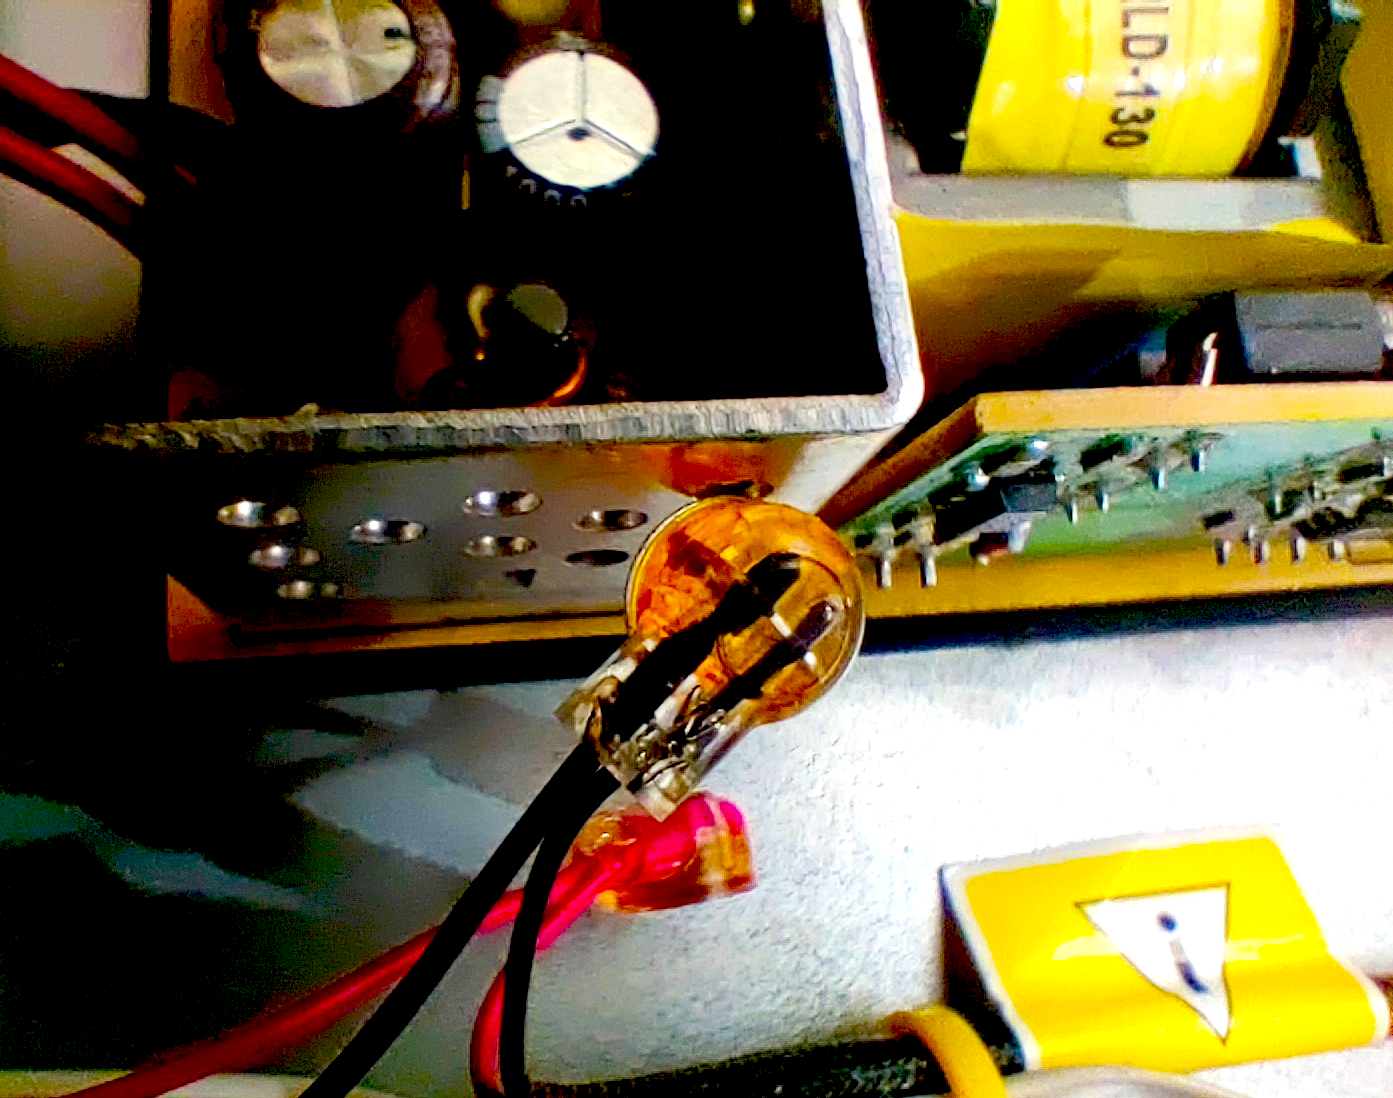
Besides normal metal fan screws, the Noctua also comes with silicone anti-vibration mounts. These silicone mounts can replace the screws and reduce fan noise because they absorb any vibrations.

For this project, the side of the fan with the logo will be facing out (the fan blows out hot air). Insert the silicone "screw" as instructed. You may need a magnifying glass to see the F and C letters moulded into each end of the silicone mount. You will only need two mounts for this project. The kit has four.
The F side that goes into the fan is easy to pull. You trim the excess with scissors. The C side secures the fan to the 3Com chassis. I had to use pliers to pull the last part of the mount through the 3Com chassis hole.

As you can see from the photo above, the silicone sticks out from the chassis. With the 3Com switch, the lid must fit on top of the chassis, and I had to use scissors to cut the silicone down and a bit of tugging to make the lid fit. Nothing complicated!
After I turned on the switch, the unit was silent. By silent I mean having to put my hand near the fan to feel the air flow. I recorded the fan sound. Compare this sound to the one taken at the beginning of this project.
Follow This, That and (Maybe), the Other:


Comments
Post a Comment